
DataConnect uses tiles to help you build your queries. Tiles can represent any component of your query. Tiles can be dragged around to re-order, dropped inside, beside and on top of to lay out the query as you need.
Anatomy of a Tile
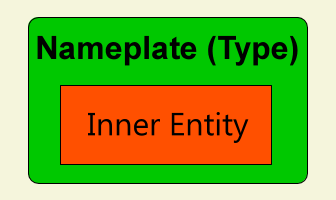
The Nameplate
The outer area of a tile, called the nameplate, has been artificially coloured green on the tile above.
The nameplate only displays a value when it is being used on the select tab, or the group tab. It displays the name and type for the column of returned data. It will be empty on all other tabs.
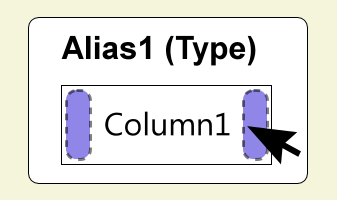
If you drag a table column on to the select tab, by default the nameplate will show the name of the column. You can change the name by setting an alias.
You can set an alias on a nameplate by simply left clicking on the nameplate and enterting an alias value.
The Inner Entity
The inner area of a tile, called the inner entity, has been artificially coloured orange on the tile above.
If you drag a table column on to the select tab, the inner entity will always display the real column name.
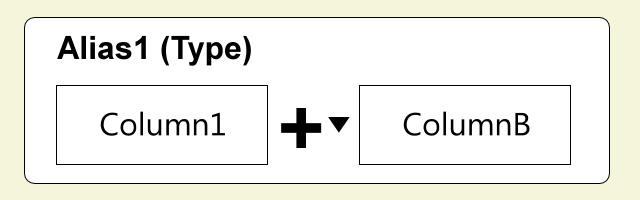
This inner area can contain one or more entites. An entity can be a column, constant, parameter or null. When you have more than one entity inside a tile, it becomes a formula tile. An example can been seen below and a description of how to create this can be seen in the section Working with Function Tiles, also below.
Add a Tile Before or After an Existing Tile
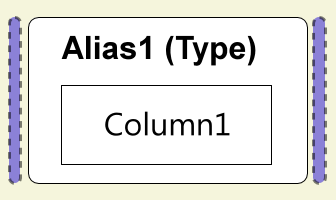
You can grab an item (column, table, constant, null or function), and place it before or after an existing tile by dropping it on the blue areas before or after a tile. The blue areas will appear when you start to drag your tile around the canvas.
If you were to drop your new tile after an existing one, it would appear as below. The blue drop areas are shown to indicate where you could drop more tiles before, inbetween and after.

Replace an Existing Tile
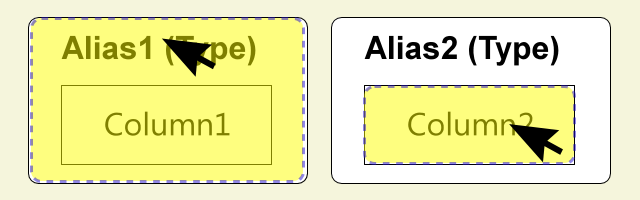
Dragging a tile and dropping it on the nameplate (left) or inner entity (right) will replace that item with the new one.
The exception to this rule is if the outer tile is a function tile. See the Working with Function Tiles section below.
Create a Formula Tile
A formula tile is where you want to perform some sort of calculation in a tile, such as Quantity * Price, or FirstName + " " + LastName.
There are drop zones at begining and end of the each inner entity. Dropping an item in these drop zones will add an inner entity in that makes the outer tile a formula tile. For example, if you dropped a column (ColumnB) in the second drop zone above, you would end up with:
The new tile ColumnB is dropped after the exsiting Column1, inside the original tile. The addition operator is a drop down, and you can change it by simply clicking on it
You can continue to add more inner entities by dropping items on the drop zones at the beginning and end of any inner entity.
Working with Function Tiles
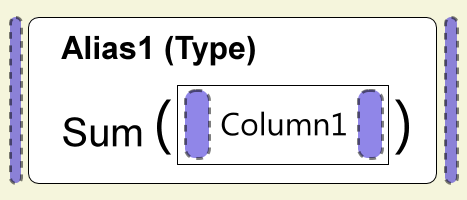
Dropping a tile before or after a function tile will place your new tile before or after the function (the same as seen in the section Adding a Tile Before or After an Existing Tile above).
Dropping a new tile at the beginning or end of the inner entity (Column1 above) will result in the creation of an formula tile (as seen in the Creating a Forumula Tile section above).
This allows you create function formula tiles that do things such as sum(column1 * column2).
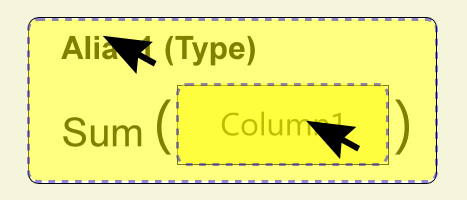
Dropping a new item on the outer nameplate will not replace the whole tile. It will replace the inner entities of the function tile with the dropped item.
Dropping a new tile on a specific inner entity will replace that entity with your new item.