If your web services are not returning data and their Message field (see here for instructions on how to map the Message field onto the dashboard) indicates that the client id cookie was not set then here are some tips on how to solve the issue. Please note that each user wishing to view the dashboard must have the cookie set on their machine.
Setting the Cookie
The client id cookie can be set in the following ways:
-
Call CheckLicense - each web service is generated with a CheckLicense method that will set a client id cookie if one is not passed on the request. This method works from the test interface on the web services tab of the designer, it will not work from remote machines.
-
Reference ImageLicense.aspx in the HTML - including a reference to this file in your dashboard HTML will ensure that all viewers have the cookie set. See here for details on how to do this.
-
Request ImageLicense.aspx directly from the client machine with Internet Explorer. The URL you need to use is derived from your WSDL URL as detailed on this page.
Checking the Cookie Exists
To check if the cookie exists:
-
Open the Internet Options dialog either from the Control Panel (Internet Options) or from Internet Explorer (Tools menu, Internet options).
-
In the Browsing history section of the General tab, click on Settings to show the Temporary Internet Files and History Settings dialog.
-
On the new dialog click on View files to open a Windows Explorer window which shows the Temporary Internet Files on the machine.
-
Scroll down to find the files which have filenames that start cookie: and look for a file who's filename is cookie:<username>@<web service domain>.
For example, if I (username richard) have generated a web service with the following WSDL URL:
http://Win7Installer/WebService_XDomain/WebService_XDomain.asmx?wsdl
I would look for a cookie called cookie:richard@win7installer/ as shown here:

Security and Privacy Settings
If you have set the cookie but are still having client id issues then you may need to modify the Security and Privacy settings in the Internet Options on your machine so that the cookie will be accepted and saved.
To modify these settings:
-
Open the Internet Options dialog either from the Control Panel (Internet Options) or from Internet Explorer (Tools menu, Internet options).
-
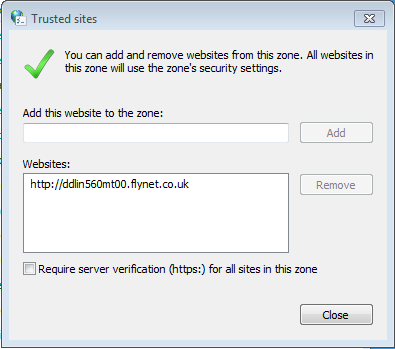
On the Security tab, click on Trusted sites (the green tick) and then click on the Sites button to show the Trusted sites dialog.
-
Make sure the Require server verification tick box is NOT ticked.
-
Paste the URL of your web service into the Add this website textbox and click on the Add button.
-
The URL of the web server (minus the path to your web service) will appear in the Websites: list.
-
Click on the Close button to close the Trusted sites dialog.
-
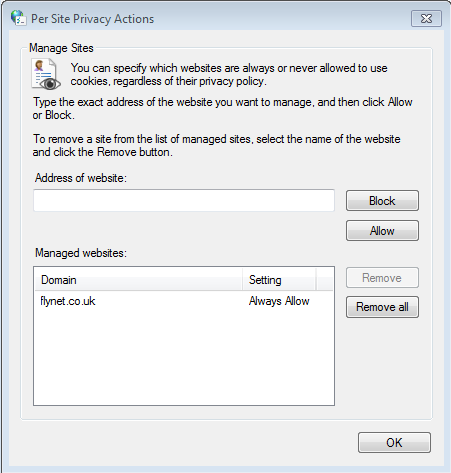
Back on the Internet Options dialog, click on the Privacy tab and the click on the Sites button to show the Per Site Privacy Actions dialog.
-
Paste the URL of your web service into the Address of website: textbox and click on the Allow button.
-
The domain of your web server will appear in the Managed websites: list with the Setting of Always Allow.
-
Click on the OK button to close the Per Site Privacy Actions dialog.
Here is how the Trusted sites dialog looks with a single website in its list:
Here is how the Per Site Privacy Settings dialog looks with a single domain in its list: